Sunday, March 3, 2013

Breakfast at Tiffany's Shower

This weekend we had the pleasure of throwing a brunch for my wonderful friend Holly to shower her and her soon to be new baby girl,
 Audrey Grace Mauldin!

Of course with a name like Audrey, no other theme would be as fitting as a
Breakfast At Tiffany's shower.    We decided to further the theme by serving brunch foods and having it in the morning.  The movie was playing in the background for those that wanted to catch up on an oldie but goodie and then Holly got to bring it home with her so she could show her girls when they get a little older.

Monogrammed welcome sign on front door.


Guest Sign In - Thank you Sign with favors basket.

Tiffany & Co. style baby banner
Breakfast at Tiffany's Shower Brunch foods.
Breakfast at Tiffany's cupcakes

Champagne Bar
Drink Menu (Including "Mommy" Mimosa's)
The ADORABLE and proud Big Sister.  Complete with pearls and black TUTU!!


Catching up with college friends.   Showers are like reunions where friends all get to come together and enjoy the new additions to each others lives.

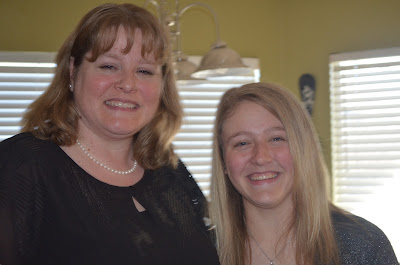
The beautiful Mommy to Be, Holly and I.


Miss Haylee getting practice holding a baby with my ADORABLE nephew, Davis.
 
Aren't these sisters just beautiful??  You can feel the love in this group for sure!!
And what else are sisters for, than to help you hold up that heavy baby weight when you back starts to hurt.  Way to go Robin for taking one for the team and helping Holly to hold up baby Audrey :).

Thank you Darling's for helping Holly welcome baby Audrey.    I had a great time doing this shower and all the Tiffany & Co.  research was so fun.  Holly's guests and the other hostesses were all so kind and friendly.   It was a great time had by all and I can't wait to meet Miss Audrey!!! 

Blueberry Scones - Just a little Thank you for all that came to make this day so much fun!


Tuesday, January 1, 2013

Vanilla Brown Sugar Scrub

Previously I posted the lemon scrub I made.  Since they were going to be for holiday gifts, I figured I would make a sweet flavor to go with the bitter lemon as a "gift pkg".    After all there is nothing better after these winter months, than a good sugar scrub to get all that winter dry skin off before swimsuit and sandel season!

I went with the Brown Sugar recipe I found here then added some vitamin E oil for the skin benefits.


1 cup white sugar
1 cup brown sugar
1/2 cup-3/4 cups olive oil
1-2 tsp of vanilla
1 tbspVitamin E Oil

Mix dry ingredients together in bown and gradually add wet ingredients in the order they are given.  Work it together with a spoon until it all looks the same.   If too dry add more oil.

Like with the Lemon Scrub - I used the small Ball Jelly Jars, mainly because I think they are cute and then also because they are the perfect size for this type of gift.


I put a cute tag on the top with the ingredients and directions. 
Then I just stacked it with a lemon one and tied with ribbon for gifts.

Homemade Hot Chocolate Mix & Peppermint Stix

I found these cute jars in my closet and had to find something to use them for.  Christmas seemed like the perfect opportunity so I set out in search of the mystery item I would put in the jars.

After many nights on pinterest and sorting through my boards, I settled on homemade hot cocoa and peppermint stix for my neighbors / family friends. 

 
I got these adorable peppermint stix at CrackerBarrell last month (of course they were at the counter - where you can't resist but buy the junk just staring at you as you check out).

For those of you who don't know what CrackerBarrell is - you are missing out!!  It is a restaurant with home cooking, generally an older crowd and an amazing fun gift shop at the entrance to browse before and after you get your grub on!

I melted some white chocolate and dipped the end of the sticks.  While they were still wet, I added some sprinkles and let them set in the fridge on wax paper.

During my Christmas grocery shopping I found these adorable Mallow Bits by Kraft.  Since I knew I was making hot cocoa, I HAD to get these, because who doesn't like mini marshmallows?? 
See...it was a necessity!

To Make the Cocoa, I used a recipe I found at penniesonaplatter
It turned out so good and was amazingly creamy and rich.  Here is the recipe:

3 cups nonfat dry milk powder
2 cups powdered sugar
1 1/2 cups unsweetened cocoa powder
1 1/2 cups white chocolate chips
1/4 teaspoon salt

Mix all ingredients into a large bowl. Pour half of the mixture into the bowl of a food processor and process until the chocolate is finely ground. Transfer to an airtight container, then repeat with the remaining mix. Store in the airtight container for up to 3 months.
To make the hot cocoa drink, mix 1/3 cup of the cocoa mix with 1 cup hot milk.


Here is the finished gift!! 
 I tied the peppermint sticks in a cellophane bag to the jar with preparation directions on a tag. 

Personalized Tile Coasters

Some friends and I decided to have a DIY party to make a few Christmas gifts this year.  We settled on tile coasters as the project and set out to purchase everything in October.  Yes, I said October.......we are proactive like that........except that we didn't actually get together to make them until December 13th...ugh!

In order to make them we purchased some travertine tiles from Home Depot. 
 They are only $3.67 for a 9 pack so we bought a few to make it an even group with sets of 4.

We got the stamps online and at JoAnns (Fun full page ones for every other tile and then some cute flourish ones with small letters.  We opted for the clear cling stamps so we could see what we were doing during the process, but any stamps will do!)

This is the H on the small acrylic block
 (upside down for some reason - I guess I wasn't paying attention to what I was doing).
Here is my finished product of my 4 sets of tiles.

After stamping with StazOn stamp pad that uses permanent ink, we rubbed a layer of finishing wax to seal the tiles and prevent condensation from cups to soak in.

Also, small felt pads were put on each corner of the bottom (I forgot to take a picture of that part).

We then tied them up with some red tulle (for a little flair)

To finish it off, I made tags for each set that said "We hope you COAST through the holidays with Faith, Joy & Cheer.  Merry Christmas - The Hawkins"

I really loved the way they turned out and I can't to make more for other occasions that may come up where I am in need of a quick adorable gift!


We got the idea from the adorable Huckaby's Happily Ever After blog. 
You can view her original post HERE.

Tupperware Cabinet Makeover

I forgot to take the before picture but we can all agree that it was a disaster!!! 

 I had Tupperware (some of the actual brand but most was a mismatch of types) everywhere and falling out every time I opened the doors.  It got so bad that when anyone else unloaded the dishwasher they would put up everything BUT the Tupperware and just leave it on the counter for me to "figure out" where to put it in the cabinet. 

I saw this great idea to line the cabinets with peel and stick tiles on Family Handy Man and then The Container store had the Elfa sale going on before Christmas so I decided I had enough with the awful Tupperware cabinet and I was going to do something about it.....now.
I got the peel and stick tile from The Home Depot.  I didn't go crazy and spend more for "cute tile" but instead picked one of the cheaper ones (since it was going in my cabinets) but still decent in appearance (not the ones that looked like 1960's brick flooring).

At only about $32 a box of 45 it was a good deal and worth every penny.
My Awesome husband installed all the tile and said that it was super easy since he could just use a box cutter to make the cuts and it was easier to measure and cut to fix exactly as opposed to that HORRIBLE CONTACT PAPER, that never goes on smooth and then peels up after a day.

The tiles make it super easy to just wipe clean.

Next I went to The Container Store and got the awesome Elfa slide out drawers to make looking for the Tupperware easier.

Finished Product....I love it ! And - we are on our way to finish installing the peel and stick tiles to EVERY cabinet in the house.  Including the bathrooms...yay!!

I put all the containers in the bottom two drawers and then all the lids in the plastic pull out drawer on top.   I didn't want to waste that valuable room in between the baskets so I put the little items like my son's sandwich holders there (they fit great and stay out of the way).   All the big stuff and large cups went on the top shelf.


Monday, December 31, 2012

Chocolate Toffe Apple Dip

  Thank you Pinterest for this to die for creation!! 
I made this for new years eve as a desert that was both rich and decident but also seemed like it was a healthy way to kick off 2013......apples are healthy, right??  At least that would be the argument I would receive from my children when anything includes fruit! Sometimes you can't argue with good reason :). 
 
This was so darn yummy that even the teenagers were coming to the kitchen to load up on dessert....and lets face it, anything that can get teenagers our of their room and near where the adults are hanging out, must be good!!!!


1 Block Cream Cheese, room temperature
4 Tablespoons Confectioners Sugar
Caramel Sundae Sauce
Mini Chocolate Chips
Crushed Heath Bar
Granny Smith Apples, sliced & soaking in lemon juice/water until ready to serve
  1. Beat the Cream Cheese and Confectioners Sugar until slightly fluffy.
  2. Spread the Cream Cheese mixture onto a serving platter
  3. Top with Caramel Sauce, Mini Chocolate Chips & Crushed Heath Bar
  4. To serve, arrange the sliced Granny Smith Apples around the platter

Monday, December 24, 2012

Seafood Fondue

WOW - Lets start this post by stating that I LOVE seafood fondue and almost always will order it at a restaurant if it is an option.  Now having said that, I had never attempted to make it at home before because all the recipes I could locate never seemed similar to the restaurant ones I have loved. 

This year for Christmas I decided to try my hand at making my own seafood fondue, sans recipe (so the ingredients below are very "general").   I figured that if it turned out horrible I would just throw it out and we would have something else as our Christmas appetizer:).........because that's how I roll.......we just go with it and expect the worst but hope for the best when cooking...ha ha.


1 baguette
Olive Oil
2 cans lump crab meat
1 bag large shrimp (frozen)
1 pkg sliced mushrooms
1 pkg 10oz spinach, thawed and drained
1 cup White sharp cheddar- shredded
2 cups Monterrey jack cheese - shredded
2 cups Mozzarella cheese-shredded
Flour
Butter
1/2 onion - chopped
3 cloves garlic- chopped

Preheat oven to 350 degrees.
To begin I grated all the cheese and chopped the onion and garlic.  I then sauteed the shrimp  with the mushrooms, onion and garlic in a little butter. When the shrimp is done and the mushrooms/onions are soft, remove and take the tails off the shrimp, set aside. 

I started by making a rue with some flour and butter.   After it is creamy, start adding cheese gradually, just taking from each kind and tasting until I got a good consistency of creamy cheesy goodness.  Then start putting all the yummy additions you cooked up earlier and the spinach.  When combined, pour into a dish and place in oven until golden brown on top.

While the fondue is in the oven begin slicing your baguette and toasting with a little olive oil in a saucepan.  When crunchy and ready to hold some delicious chunks of seafood, put aside and then wait (pace, drink some wine, keep checking it) until it is done.  :)

It is so darn yummy that I can't stand it and just writing this post is making me want to make it immediately!!

Thursday, December 20, 2012

Lemon Sugar Scrub


This year I decided to try out the phenomenon of making your own body scrub.......ok, well maybe it isn't a phenomenon, but I have heard it a lot this year.  I figured how hard can it be??  I can try this out and I LOVE lemon scents in the kitchen  so I am going to start with that.

Guess what?.........
It turned out AWESOME!!  LOVE LOVE LOVE it!!

Here is how I did it:

- Zest of 1 lemon
- Juice of 1 large lemon
- 2.5 cups plain white sugar
- 1 cup Olive Oil
- 1 Tbsp Vitamin E Oil


Mix oil and sugar together in bowl.  Add in the lemon juice and zest and mix again.  Then add in the Vitamin E Oil Last.  Stir together until well mixed.  Add extra oil if needed for desired consistency.
I put in these cute jelly jars.  It actually filled 6 of them with one batch, so it was pretty easy to finish up the dozen jars I got.  You could get some jars a little bigger and just use 6.
(I know, I know.......ingenious and you never would have thought of that, right).

I put a little tag on top with the ingredients as well as storage requirements. 
(It last 2-3 months if stored in the refrigerator.   Try to keep water out of it when using)

Now go get to scrubbin'................just kidding.  No seriously, scrub away!!
(I made my husband try this and even he thought it was amazing and made his hands really soft, although he will never admit it if asked!)

Here is a link to the template I made for the tags:
 https://www.dropbox.com/s/m15xw62ud49r4ss/Sugar%20Scrub%20Tag%20Template%20-%20Blog.pdf


Teacher Christmas Gifts

It's Christmas time...YEAH!!!  Craft and gift time for the teachers in my life.  My youngest is in preschool so we still do the teacher gifts (unlike my teenager who would just die if I sent gifts to his teachers in High school - although I am sure those teachers would like a little pick me up during the holidays also).

Drake's school had these sheets at the front desk with the teachers for each class and one for the office personnel that had info about them.  Stuff like their favorite colors, scents, food....etc.  I personally love this idea!!  I know some people don't want them to expect gifts by putting a "requirement list" out there but I would really prefer to give people stuff they like then just random junk so this is a phenomenal help to me!!

This year I used their favorite colors from the info sheets to put together a little foot care kit for the holiday.  I included a fuzzy pair of socks with coordinating nail polish.  For the teachers in Drakes classroom, I included some lotion and a gift card for some Mexican food. 

OK - I know that Mexican food is not "foot oriented" but who doesn't want Mexican food all the time anyway.  It seemed like a good idea at the time, don't judge!


I made these tags and printed them on card stock in the coordinating favorite color and then just attached to the plastic bags.  

The back had the name of the teacher and Drake's name so we could drop them off to each person even if they weren't at their desk. 

Here are some of the ones I made.....they were all different to fit each person.  


One of the teachers is a man so I did something a little different for him.  He loves Coke Zero and Reeces so we just made him a No Stress Kit for the holidays instead!   
 

Merry Christmas Everyone!!


You can download the .PDF  template here:
https://www.dropbox.com/s/6iv4k3u8gueygqw/Mistle%20Toes%20Tags.pdf